Tuesday, November 16, 2010

5 Tips for Growing Leafy Greens


1. Most greens prefer a loose, fertile soil. You can achieve this by adding compost to the soil and making sure all the large clumps of soil are broken up.

2. Be sure to plant the seed at the appropriate depth. Most leafy greens are small seeds and get planted at about 1/8 inch. If planted too deeply they may not germinate.

3. Leafy greens are cool weather plants. In the southwest you can plant them starting in October and through the winter. Once the temperatures start to rise above 75 degrees, they will ‘bolt’ and go to seed.

4. Extend the harvest season by planting the seeds over several weeks (succession planting). Once the first planting germinates (pokes through the soil), plant some more!

5. Harvest greens by taking the young leaves from the outside on the plant, leaving the younger inner leaves. The plant will continue to grow from the inside. If you have several plants growing on the garden of each kind of plant you can have fresh greens all season long!

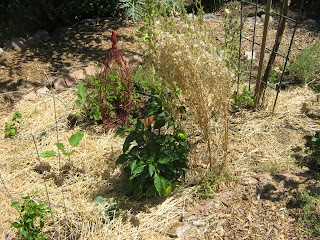
The beets and broccoli rabe featured here in the pictures were planted by seed on October 17, 2010.  I have been eating the broccoli rabe already as I thin them out.  The beets are next!

Happy eating from your garden!
The Garden Goddess
http://www.down2earthgardens.com/


Monday, November 8, 2010

Community Gardening is on the Rise in Phoenix

Community Gardening has  become a new-hip thing to do in Phoenix and surrounding cities. There are many reason for this ranging from people wanting to beautify vacant lots, neighbors getting together to do something outdoors, feeding the hungry, sending food grown to a foodbank and more.

 The problem is people are not sure how to navigate the process of starting a community garden. Creating a community garden is much more then knowing how to grow plants.  It is mainly about how to organize a group of people, secure the land and then figure out how to kept it going.  The growing part is easy after that!

There are several ways to get started on the journey.  The American Community Garden Association has many helpful tools on their website - http://www.communitygarden.org/  Here you can find step-by-step instruction as well as sample forms for leasing the land and renting out plots.  There is even a list serve where other members share their personal experiences and ask and answer questions.

On perhaps you prefer a more personal approach and want to be able to talk this through with an experienced person - well that is me!  On Thursday, November 18th I will be leading a 90 minute class entitled: So You Want to Start a Community Garden?  I will be sharing my personal experience as a garden manager, the results of my research and what I have learned as I have met with and helped other community gardens.  It is being hosted at the Maricopa County Extension Office and presented through the Phoenix Permaculture Guild.  You can see more about it here.

Then next April, there will be a conference for community and school gardens on April 1+2, 2011 here in Tempe, AZ.  Growing Communities, One Garden at a Time is the American Community Gardening Associations, Southwest Regional conference.  I am honored to be leading that effort.

I would like to know more about your ideas and questions about community gardens.  Do you participate in one now?  If so where and what is the name of the garden?  What is your experience?  Please drop me a line or leave a comment here!

Wednesday, October 27, 2010

The Waiting Game Begins

The Waiting Game Begins


I had 9 wonderful garden helpers about two weeks ago help me plant my winter garden. I taught them the proper way to plant seeds with learning about seed depth and spacing. They got into the garden soil, making furroughs for the tiny seeds and poking holes for the bigger ones. Here's what we planted: garlic, onions, beets, broccoli rabe, (2) lettuce, Swiss chard, cilantro, turnips, arugula, green onions, peas and parsley.


And three days later the broccoli rabe sprouted from the soil. Now the garlic and onions are up too! So are the lettuces, peas and the arugula. Some have not sprouted yet and I am not really worried. The germination days on the back of the seed packet help us track when to expect the seeds to break through the soil so we don’t have to guess.


But now the waiting game starts. The plants will get bigger every day but the vegetables may not be ready for harvest for at least another 60 days.


So for now I am still going to the Farmer’s Markets and the store to provide my food. But soon my patience will pay off and I will be eating from my garden!!


Happy Digging

The Garden Goddess

www.down2earthgardens.com

Sunday, October 17, 2010

Beets, Bok Choy and Brussels Sprouts – A Winter Vegetable Garden

Beets, Bok Choy and Brussels Sprouts – A Winter Vegetable Garden

 Photo corteousy of deepthoughtsbyhealey.wordpress.com/.../19/beets/


Gardeners in the low desert of the southwest are gearing up for another gardening season and perhaps the bigger of the two. Fall and winter gardening plants choices are greater and the weather is milder.

Soil and air temperatures impact the germination of seeds and the growing of the plants themselves. When air temps are still over 100 degrees during the day, the evenings are still warm as well. These conditions are not favorable for the tiny seeds to burst open with life. Many vegetables can be started indoors on a very sunny windowsill or counter and transplanted outside in the garden when the temps are less than 90 degrees during the day.

There are many plants which grow during this cooler season but some of the common ones are beets, bok choy and brussels sprouts. Of these three, brussels sprouts have the highest amount of protein and fiber – too bad they get such a bad wrap by so many people!

These three plants also represent three different species of plants. Beets are called root vegetables because we typically eat the root or the beet root; bok choy is a leaf vegetable because we eat the leaf and it doesn’t produce a separate vegetable and the Brussels sprouts are part of the cole crops (Brassica oleracea) like cabbage and broccoli.

Root, leaf and cole crops are the three species that grow best in cooler weather. Many of them will sit and wait to grow until the weathers cools down if planted in warmer weather.

Here are a few planting tips to ensure a successful fall garden:

1. Wait until it is below 90 degrees to plant in the garden
2. However you can begin to prepare the garden bed. Remove any dead or diseased summer plants.
3. Amend the soil – it has been depleted of most nutrients by the summer crop and the heat and sun.
4. Add organic mater like compost, earth worm castings, even bury your kitchen vegetable scraps.
5. Only turn your soil deeply if it is heavy clay soil and needs a lot of amendments.
6. Otherwise just mix in the organic matter into the top 6 inches or so.
7. Water the garden well and wait a few weeks before you plant seeds or transplants.
8. Read the back of the seed pack for instructions specific to that plant. This will also help ensure greater success.

Just remember to be patient with the plants, keeping soil uniformly moist especially when the plants are young. Some of these plants will take up to 90 days before the vegetable forms and if all the seeds are planted at the same time, they will mature at the same time. When it is time to plant, sow seeds at two to three week intervals to extend the length of time to harvest throughout the season.

Growing your own food is fun and rewarding. It is a great way to spend time outdoors and get some exercise. Share the surplus with neighbors, or learn to ‘put up’ the harvest by canning or freezing. You will be glad you did when you taste fresh grown vegetables this winter.

Thursday, September 30, 2010

Turn Your Trash into Great Garden Fertilzer

Kitchen scraps, shredded paper, and lawn clippings usually end up in the trash bin, but can easily and cheaply be turn into a source of rich nutrients to add to garden beds. This is called composting, and while many people assume that composting is a complex and challenging undertaking, there’s really no need to be intimidated.


The benefits for the garden are many: it improves soil structure and also water retention, helping to keep plants healthier for longer in dry conditions. It provides a source of slow-release, organic fertilizer for plants, while at the same time boosting the community of microorganisms and other creatures beneficial for plant.

Composting is as easy as 1-2-3.

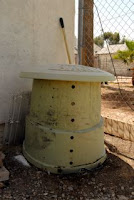
1) Get a bin: Compost needs a certain critical mass of organic material to create enough heat for decomposition to occur.. Something to contain this matter is helpful. Most city waste departments now offer a free or low cost waste bin to be used for compost. Just check your city’s website or call the waste management department.

2) Fill it: All manner of waste can go into a compost bin. There are two basic types of organic waste: nitrogen-rich (aka “greens”) and carbon-rich (aka “browns”). Use about twice as much carbon-rich material as nitrogen-rich. Some good carbon-rich materials include dead tree and shrub leaves, cardboard, newspaper, shredded paper and wood chips. As far as nitrogen-rich materials go, think of fresh grass clippings, green yard waste, vegetable scraps from the kitchen and even hair (think of Fido’s brush).

3) Turn and water: Organic matter needs both oxygen and moisture to break down. To add more oxygen, give compost a turn every once in a while with a pitchfork or shovel and keep compost generally as moist as a wrung-out sponge.

There you have it! Let nature take its course. In a matter of time, some of the best garden food ever, all made from stuff that would have thrown away, is free to use in the garden.

For more details including a complete list of WHAT you can compost -  attend a workshop I am doing on Saturday, October 2nd from 1pm - 2:30 pm with the Phoenix Permaculture Guild.

Location: Central Slope Design Center

Street: 8801 N. Central Ave
City/Town: Phoenix, AZ 85020

Hope to see you at class soon!

Happy Digging,
Doreen Pollack
aka the Garden Goddess
http://www.down2earthgardens.com/

Monday, September 13, 2010

Fall Means a Fresh Start in the Garden

There is a change in the air in Phoenix. The evenings and mornings are definitely cooler. The humidity is gone and so is the monsoon rain. The leaves on the Mulberry trees are starting to yellow slightly and drop.


This slight shift always has me feeling hopeful and excited for another planting and growing season. Time to clean out the garden beds, re-build the soil with my compost, rake it smooth and get the seeds planted. Time to make the row markers, set out a plan of what goes where, and start to think about the color that comes from flowers in the garden. Oh I almost forgot, I pick a new edible plant to grow each year – I wonder what it will be this year – Do you have a suggestion for me?


While I was watering yesterday, I noticed one of my artichoke plants is emerging from its summer rest. I have two – I hope the other one comes back!

I like to take a reasonably-paced approach to getting the gardens ready for a new season. I start with getting the garden cleared and soil amended one week. I like to let the compost and any other amendments sit in the ground for a week at least before I plant into it. Looks like I will be doing this on Sunday morning while it is cool. That also lets me take stock of my seeds and purchase anything I may still need. However – after the bounty I got at the American Community Gardening Association Conference I attended in August and the seeds I got at the Seed Swap last week I think I may be set this year!


I also have new seeds from Humble Seed for an herb garden – aptly called Uncle Herb’s Favorites – 10 different herbs in a great package that can be reused. What I love about this company is they are very particular about where they get seeds and the package them locally using the Marc Center.
So in a few weeks I will be planting out my new garden. I am excited about eating fresh lettuce, spinach and other greens, beets and peas – all in about 2 more months! The gap between will need to be supplemented by the farmers markets.


What are your plans for a fall garden? Please let me know if I can help. I am starting to book consultations now – just email me at gardengoddess@down2earthgardens.com or call 623-217-6038.

Happy Digging,
The Garden Goddess
http://www.down2earthgardens.com/

Tuesday, September 7, 2010

September Garden Tips - Fertilize Citrus NOW

September Gardening Tips


(as found on the Maricopa County Extension Office website and
What to do in Your Garden this Month)

Turf

- Fertilize Bermuda-grass lawns with Nitrogen each month beginning late April or early May according to the directions on the package.

- Apply Iron each month according to the directions on the package.

- Apply one inch of water per week to Bermuda lawns. Water deep and less often.  Find watering instructions here on Arizona Water Users Association website

Vegetables

- Prepare bed for fall planting: add organic materials, compost, nitrogen (blood meal)

- Plant Seeds: Snap Peas, Beets, Bok Choy, Broccoli, Brussels Sprouts, Cabbage, Chinese Cabbage, Carrots, Cauliflower, Celery, Chard, Collard Greens, Endive, Garlic, Kale, Kohlrabi, Leeks, Mustard, Onions, Peas, Turnips


Herbs

- Prepare bed for fall planting: add organic materials like compost
- Plant Seeds: Cilantro, Lavender, Parsley, Sage, Thyme, Oregano (transplant- will spread)

Roses

- Resume full fertilizing of established roses as the weather cools

- Toward the end of August and into September add an iron supplement if roses show yellowing from iron deficiency

Succulents
- Plant and spilt agaves, yuccas and cactus (remember the holidays are coming – put in a nice pot for a gift)

- Cut back on watering when temps drop by 10 degrees. Should spread out watering to 3-4weeks for small plants; 5-6 weeks large plants during winter.


Fruit and Nut Trees

Fertilize Citrus by mid-month.
- Cut back on water once temps are below 100 degrees to every two weeks. Helps Citrus and deciduous fruit trees prepare for winter.

- Apply nitrogen and zinc to pecan trees to produce normal size leaf growth and to enhance kernel development. Pecans also need more water than most other shade trees.

Landscape Plants 

- Apply mulch (a great use for your compost!)  to the ground around heat sensitive plants keep the roots cooler and prevent evaporation.

- Cut off spent blooms to stimulate rebloom

- Native and imported heat tolerant plants can be planted right through the September. They will need to be watered on a regular basis until it cools in fall. 

- Protect newly transplanted trees from heavy winds and dust storms by staking carefully

- Plant any non frost sensitive tree

- Final fertilizer for container plants.

Annuals

- Plant flower seeds when under 100 degrees.  Here's a list to guide you.

- Bulbs – Buy now & refrigerate for 6-8 weeks in a brown bag in an area by themselves (not with fruit or veggies). Can plant when below 90 degrees during day.

Don't List . . .

-Do not increase opportunities for fungal disease on turf by over watering or watering at night.

-DO NOT OVER WATER which will result in root rot. Allow the soil to dry out between watering.

Doreen Pollack is the Garden Goddess and owner of Down 2 Earth Gardens, providing garden consultations and coaching. Join her for free gardening tips at monthly What to Do in Your Garden this Month workshops. To find a workshop near you, visit www.down2earthgardens.com or call 623.217.6038.

Friday, August 27, 2010

Time to get the Garden Ready for Fall

It may feel hot and muggy in these dog days of summer, but this is the time to get the garden beds ready for fall planting.  As I cut back last years wildflowers and saved the seeds I decided to keep the base of the plant in tact and left some leaves on it to see if it will come back in the spring.  The leaves were still green, so my guess is it will.  I love to see what plants naturalize in my garden.  Annuals to some areas of the country become perennials in my garden!

I decided to dig out the hollyhocks that somehow found there way into my vegetable garden.  They took up too much precious real estate.  Out came the wild amaranth and anything else that was not going to produce food for me this winter.

The sweet pepper plants are holding their own fairly well this summer so they were allowed to stay - one of them is now 18 months in the garden and still producing red sweet peppers! In fact, you will find that sweet peppers will bounced back in the fall and produce another crop!

The basil is doing well, too. There are 2 eggplants that have not produced any fruit yet, nor flowered, but I will leave them in for now and see if they come back once it cools down again.

I also started to amend the soil in another garden bed.  I used my own compost and mixed it in with the existing garden soil with a shovel and water it well with rain water from my rain barrels.  I do a section every few days and it makes the process seem like less work.

The seed nursery is also started - I am using the broccoli seed from my own plant.  I bought some peat pellets (they expand to almost 2 inches when wet) and placed a few seeds in each one last Saturday morning.  By Monday they had sprouted and they are now taller then the little hot house I created using a plastic lettuce container I got from the grocery store. 


These little hot houses work well because they keep the moisture in so the seed scan sprout.  I also use the clear plastic clam shells.

Another thing you can use to make your own small seed starting pots are the cardboard rolls from paper towels and toilet paper.  I just cut them to about 2 inches tall, put them in one of these little hot houses, fill them with potting spoil and plant the seeds.  Then when the seedlings get big enough the entire roll can be planted directly into your garden or a larger pot if the garden is not ready or you wish to give them to someone.


Paper rolls cut for pots

October 1st is the target date for planting seeds into my garden beds.  I may start a few more seeds before then, but mostly seeds in the ground this year.

What about you?  What are your plans for your edible garden this year??

Happy Digging,
The Garden Goddess
http://www.donw2earthgardens.com/

Wednesday, August 18, 2010

Herbs are Easy to Grow in the Desert

Yesterday and I had a great interview with the East Valley Tribune about an upcoming Herb Gardeneing class in Mesa on August 25th. Here's the story - nice job!!  Just click the story title below my name.

Doreen aka The Garden Goddess
http://www.down2earthgardens.com/

Group sows seeds of herb cultivation in desert

Tuesday, August 17, 2010

Prickly Pear Juice Making

Today was my first foray into making food with a part of a cactus!  Here in AZ and in many other arid climates, the Prickly Pear cactus grows everywhere.  It is used as a landscape plant in people's yards as well as in public spaces. The fruit of the Prickly Pear is a bright red and often called a tuna.  The pads of the prickly pear are called nopalito.  Both of these are often found in the stores here in Phoenix, but when buy it when you can pick it for free from your yard?

Both fruits and pads of the prickly pear cactus are rich in slowly absorbed soluble fibers that may help keep blood sugar stable.  However, I suspect that after I make this yummy juice into a syrup, it won't be so blood sugar friendly!

Here's a quick step by step description of the process:

Pick the tunas when they are really red to ensure they are ripe.  There is a short window of time before the birds start to get them so keep watch on your cactus plant! Bring them into the house to wash them and scrub off the clusters of fine, tiny, barbed spines called glochids.   We used a stiff vegetable brush to scrub them and held on to them with a tong.

There is no boiling or cooking involved in this process!


After they are washed, put several in a blender (a food processor would probably work, too) with just a little water and give it a good whirl to pulverize them into a pulp.  We didn't even bother to cut them into smaller pieces, we just let the blender do the work!  Looks really pretty doesn't it?  At this point the seeds and any other small spines still remain, so it is important to strain this through cheese cloth.


This pulpy substance will be too thick to strain through the cloth on its own, so you will need to squeeze it through the cloth,  This was the messy part.  It is best to use a colander to further strain out any seeds and of course you need a bowl or pitcher to catch the juice!

That's all there is to making the Prickly Pear tuna into juice.  Now I can further process it into syrups, jellies and then use that for all kinds of things like candy, cocktails, lemonade, smoothies and whatever else my imagination dreams up!


Here's a trivia fact for you - The Prickly Pear Cactus is the state plant of Texas!

What is your favorite way to use Prickly Pear Syrup??

The Garden Goddess,
http://www.down2earthgardens.com/

Wednesday, August 4, 2010

Exploding Artichokes are a Wonder!

Notice the small seed near the penny
Last week I noticed something odd on the workbench in my garden shed. There were these fluffy ‘things’ with a seed on the end. They reminded me of a dandelion when it has gone to seed and the seeds take flight. But these were much larger, yet they danced lightly on the surface of the table when the air moved as I passed by. I look around to see where they came from – and I saw it! The artichoke I was drying on the table top was exploding with these seeds.


Articoke flowering
Disappointment was the first reaction – I was drying them so I could keep them around for a while. The pretty purple flower that emerges from the tight flower bud we usually eat was lovely. My neighbor told me I could dry them and use them in flower arrangements. I was dismayed when it started to fall apart and send its seed into the wild.

But then I thought - COOL - this is the full cycle of the artichoke plant. What a wonder to see it go from the small transplant that was planted in my garden last October to these tiny seeds that become airborne with the lightest breeze.

I have been amazed time and time again this year as I have allowed several plants to mature through their full cycle and not just pull them out because I had eaten them.

Artichoke plant before the bloom
This is yet another chapter in the journey my garden leads me through. I have enjoyed saving the seeds of the plants this year and will continue to do so, keeping those that do well in my yard/garden and composting the rest.

I took a trip up to Cornville, AZ last month to meet with one of the greats in seed saving, Bill McDorman, founder of Seeds Trust, a 25 year–old family seed company. I had a lovely tour of their gardens and their seed workshop where they lovingly and carefully package the seeds. I am excited about their upcoming 8-day Seed School. Whether you just purchase seeds from Bill, or register for the Seed School, I know you will be humbled by the wonder of seeds. I may never buy a transplant again!

Wednesday, July 21, 2010

Community Gardens Build a Better Community

I am often asked how to create a community garden. Someone sees an empty lot in the area and thinks a garden is the solution, or another person wants one in their city park. I have even heard from city officials who want a community garden on vacant lots to help keep the dust down and trash at bay. And my response to them is always the same, “The first word in community garden is community. Build your community around the garden first, then design the garden!”


Community gardens need someone behind them to organize others to get involved. Not everyone will think a garden is a good idea. Some will want to garden at home and not go somewhere else to garden, others will not know how to garden and be intimidated by a community garden. And yet others will see the benefit of working together on something to beautify their neighborhood and get people out of their homes to get to know each other better.

This is what happened in my own neighborhood, the Coronado Historic District in Phoenix, AZ. What started out as a casual conversation at the local coffee shop, Toast, turned into a garden that has been going now for 2 years. It has had its own challenges and ups and downs, but we got our first plot renter from the Nabe and I expand my growing space to the garden as well.

There is a story about it and pictures on the Coronado Neighborhood website. Take a moment to read it, check out my neighborhood that I am proud to live in and let me know what you think.

Are you a community gardener? Do you know someone who is? I would love to hear others experiences. Please share!

I am headed off to Atlanta in a few weeks to attend the nation conference of the American Community Garden Association.  it is open to the public, so please join me!!

Happy Digging,
Doreen, the Garden Goddess
Community Garden Consultant
http://www.down2earthgardens.com/

Monday, July 12, 2010

Look What I Found in the Garden


Here's a photo blog of all the yummy food (and people) I found in the Garden for Tomorrow created by the Tiger Mountain Foundation and Darren Chapman this past Saturday in Phoenix, AZ.


Happy Gardening
The Garden Goddess

Monday, July 5, 2010

Protecting your Garden from the Birds

I wrote an article last month about using netting as a way to protect your prized fruit trees and vegetable garden from the birds. And I got an education about WHY THAT MAY NOT BE THE BEST SOLUTION!

Deborah, one of my readers, volunteers at Liberty Wildlife in Scottsdale, AZ and took the time to share a few facts about the trouble netting causes the birds:

 
“In our public outings with the Education birds, we attempt to increase the public's awareness about the impact of various materials on wildlife. Topics range from fishing line left on the ground, balloons, plastic, and netting.

 
Right now, at Liberty Wildlife a Cooper's hawk will probably have to be euthanized because his legs were entangled in netting. Blood flow was cut off for too long of a time before he was found, and he can not properly use his talons. He is a beautiful, fully-flighted bird who cannot use his feet, and therefore, unable to survive in the wild. He was not going for the fruit; Cooper's hawks are meat eaters. “

 
Thanks Deborah – I never stopped to think about this – I always cut up the plastic rings from a six-pack of beverages as I remember learning they end up in the ocean and sea life gets trapped in them, but I had not considered the impact of bird netting and the birds!

I did a little more research and found this:  "..but in many cases products like nylon bird netting degrade rapidly and quickly become ineffective due to poor installation. Degraded nylon bird netting also has the potential to entrap wild birds,..." (PiCAS)

 
Here are a few other things you could use:
  • Hang old CDs or DVDs in the tree with a sturdy twine. Do not use fishing wire for the same reason that it could get wrapped around a birds led or body.
  • Use very sheer curtains you get from a thrift shop, yard sale, or your own linen closet!
  • Same for using any sheer material with really small holes so the bird can’t get tangled in them
  • Pick the fruit and let it ripen off the tree somewhere safe from the birds.

Always plant more than you need, in case the birds get to it before you!! Share the surplus is a Permaculture ethic and one that goes to animals and as well as humans. You won’t be so discouraged if you have plenty of food in the garden for everyone.

 
By keeping a garden that supports and doesn’t harm the eco-systems you will find that in the long run, you will need less additives to your garden like fertilizers and other chemicals. Birds also eat bugs that may be damaging to your garden, so don’t scare all of them away!!

 
Happy Digging,

The Garden Goddess


Thursday, July 1, 2010

Are Summer Gardens a Sustainable Option in Phoenix?

Are Summer Gardens a Sustainable Option in Phoenix?


I am beginning to re-think growing my own food – in the middle of the summer in Phoenix! Today was the 5th day in a row over 110 degrees, it has been 75 days since the last rain fall and the low temps are still in the 90’s. Every morning I get up to check on the plants, water them, and hope for the best.


I practice safe gardening – I mulch the soil, shade the plants and deep water. Yet when it is this hot and dry (did I mention no humidity?) the plants get stressed. Seems like the only thing I can do is add more water. I need to water more frequently as the soil seems to dry out more quickly, especially when the wind picks up even ever so slightly. My water usage is double what it was last month and no one is visiting me use the household water – it is all going into the vegetable garden.


I get so much more from my garden than just food, but it is usually when I am puttering in the garden beds. This time of year who even wants to be outside? My morning routine is consumed with jumping out of bed and dashing outside to check the garden before it gets too hot for me or them. Walking the dog takes a back seat to the garden. Seeing those sad puppy-dog eyes is hard, but the plants need me too!


Yet I can’t just stop watering either now that they are growing. It would be akin to killing them! I couldn’t even kill the one-legged grasshopper I found in my bedroom today (thanks to the cat). He seemed half dead, so I pout him in the kitchen compost pail. I will et him die naturally while nibbling on the vegetable scraps! But I digress.

It’s all in the planning – time make a note in the calendar of the garden journal for next year to remind myself to get the summer plants in early enough so they provide a harvest earlier in the summer and I can put the garden bed to sleep for the summer. Then I can take some time to get out of the heat!!

How is your garden handling this AZ summer heat?

Stay Cool,
The garden Goddess
http://www.down2earthgardens.com/

Monday, June 28, 2010

It’s Mosquito Time!

It’s Mosquito Time!


Even the low-desert in Arizona has mosquitoes. With the upcoming rains it is important to check your yard and gardens for standing water. Here are some typical places to check:

• Ridding your backyard of standing water. Common places include old tires, buckets, wheelbarrows, gutters, and pet dishes.

• Emptying plastic wading pools, birdbaths, plant pots, or drip trays every four to five days.

Draining standing puddles, ditches, tree holes, or tree stumps.

• Ensuring your swimming pools and decorative ponds/fountains are clean and operational.

• Fixing or installing window and door screens around your home, and properly maintaining your evaporative cooler.

• Avoiding over-watering your lawn.

For more detailed information about mosquitoes and to get an email with WHERE and WHEN Maricopa County is spraying the pesticide check their website: or cut & paste this into your browser - http://www.maricopa.gov/Public_Health/HotTopics/wnv/

Mosquitoes are more than annoying. In some parts of the U.S. they carry the West Nile Virus. You can help repel them from you naturally by applying these to your skin and you will smell great too! Use Vanilla Oil (REAL vanilla oil from Mexico) or Lavender Oil dabbed on your wrists.

Safe Gardening,
The Garden Goddess
http://www.down2earthgardens.com/

Friday, June 18, 2010

AZ Garden Resources - friends of mine

AZ Garden Resources - new friends of mine

Today I came across some great resources for AZ Gardeners:

http://terroirseeds.net/ Heirloom Seeds, recipes and good advice

http://www.seedsave.org/ Bill McDormand is an expert is seed saving techniques and practices

http://humbleseed.com/blog/category/humbleseed/ Heirloom seeds, plant information, recipes and sustainable living advice

http://www.lgpg.com/ - this company helps lawn and garden businesses with new product launches as well as selling a business or acquiring one.

These fine folks are all members of the Garden Writers Association, http://www.gardenwriters.org/ which I am too!

Please check them out and tell them The Garden Goddess sent you!

Ahppy Digging
http://www.down2earthgardens.com/

Tuesday, June 15, 2010

Garden Dissapointment

Garden Dissapointment

Maybe I should be de-throwned - take away my goddess-hood - my garden looks awful!  This is the time of year - as we lead into summer - when plants begin to slow down, tomatoes stop flowering and the garden looks sad - pitiful.

I also have a few dead Bachelor Button plants in the garden becuase they are shading the peppers and cucumbers. And I laid down alfalfa hay as a mulch - so it's just not as pretty as the winter/spring garden.

It is also the fact that I have a hard time pulling anything out of the garden.  I let the hollyhocks, bachelors buttons, and mexican hats grow full term and go to seed - (ALMOST - I pulled them earlier this year so they wouldn't re-seed this time) that I do not have room for the next season's plants or seeds early enough in the year.

So I PROMISE that I will become better at planning on paper and with a calendar so I can grow more food and keep the flowers to their own space so I may keep the honorary title of Garden Goddess and I will be equally PROUD of my summer garden as I am of my wionter garden!

What are you growoing in your garden this summer and how are you protecting it from the sun?

Safe Sunning!
The Garden Goddess
http://www.down2earthgardens.com/ - a NEWLY redesigned websiute - please visit!


Wednesday, June 2, 2010

Mesquite Trees provide a Healthy Food

This traditional Native American food is produced by gathering ripened seedpods from the mesquite tree and grinding them into high protein flour. Mesquite meal or flour is low carb, low fat, and low glycemic. The Arizona Natives; Velvet Mesquite, Honey Mesquite and Screw Bean Mesquite are best for a sweet tasting bean and hence good tasting flour.

The flour can be added to breads, cookies and similar things or it can be eaten by itself. Mesquite pods have lots of natural sugars, protein, calcium, and soluble fiber, which make it a nutritious and tasty food from the desert

The height of mesquite bean picking occurs typically in June (before the monsoons) and September (after the monsoons). The beans need to be picked from the trees when the beans are dry. It is a tight window to get them before they hit the ground.

If you want to begin collecting the mesquite beans here are the specifics:

• Collect only dry beans.

• Collect only beans that are on the trees (spread a sheet on the ground and shake the branches.) DO NOT collect beans from the ground as you don’t know what kind of pollutants or other contaminants have gotten on them.

- Make sure that no pesticides are sprayed in the area where the beans are collected as it will become part of the flour

There is a specific way to grind them (you could ruin your blender if you try it your self!) with a hammermill.  There is usually one availaible on the fall through the Phoenix Permaculture Guild,

OR join ME this coming Saturday, June 5th for a walk-about in a city park to kearn how to identify the trees and learn more about this wonderful native food!
Happy Picking!
The Garden Goddess,
http://www.down2earthgardens.com/

Sunday, May 16, 2010

The Peaches are Almost Ready

This is the first year I got peaches on my May Pride Peach Tree.  The tree has been in the ground in my garden for a year.  There are 15 peaches turning a pretty rosy-pinky color!  I go out ever day to give them a little squeeze to see if they are ripening. 


I noticed that two of the peaches have little holes in them - perhaps the birds?  I have lots of birds (Verden Wrens and even a love bird!) becasue of my sunflower forest!
What's growing in your garden on May??

Happy Digging, Doreen
http://www.down2earthgardens.com/

Monday, May 3, 2010

Watching Ladybugs Being Born

Watching Ladybugs Being Born

Today I was given a wonderful birthday gift – a chance to watch Ladybugs aka Ladybirds emerge from their immature state.


As I was walking through the garden this morning I noticed little black bugs all over the Cilantro plant that had bolted a few weeks ago. I was hoping to harvest the coriander seeds (the seed of cilantro) but instead saw these bugs. Upon closer scrutiny I noticed the ladybugs as well. Some of them looked like they were pupating right before my eyes.

(The yellow spot is the larvae shell and the red spot is the lady bug.


What a wonderful site it was. I even saw one ladybug take her first flight! They will have plenty to eat and drink in my garden with all of the aphids and nectar from the wild flowers.

What a wonderful thing I witnessed by just observing!


Happy Digging,
The Garden Goddess
http://www.down2earthgardens.com/

Labels

AZ vegetable gardens (12) arizona gardening (12) compost (10) Garden Goddess (9) Down 2 Earth Gardens (8) Phoenix (7) permaculture (6) vegetable Gardens (6) AZ (5) bermuda grass removal (5) community garden consultant (5) edible gardens (5) gardens (5) monsoon rains (5) Garden planning (4) seed saving (4) Community Gardens (3) Companion planting (3) Garden design (3) Soil (3) apple trees (3) beets (3) computer garden design tools (3) desert (3) fall planting (3) herbs (3) low desert gardening (3) low desert winter gardens (3) mosquitoes (3) mulching (3) rain harvesting (3) Garden Maintenance (2) Gardening tips (2) Master Gardeners (2) Rain barrels (2) Squash Bugs (2) Swiss Chard (2) Three sisters garden (2) amending soil (2) apple (2) basil (2) bats (2) citrus (2) design (2) earth day (2) edible (2) flowers (2) gardening (2) green peppers (2) mint (2) nematodes (2) pruning (2) rain guage (2) rosemary (2) soil secrets (2) sustainable gardens (2) tomatoes (2) tree (2) "Bill McDorman" (1) ARMLS (1) African marigolds (1) Blossom End Rot (1) Christmas Cactus (1) Clay (1) Coirn (1) Companion planting. (1) Contest (1) Cornville (1) Corriander seed (1) Deswrt gardening (1) Doreen Pollack (1) Double digging (1) Fall garden clean up (1) Fall gardens (1) Gambusia (1) Garden Tools (1) Garden books (1) Garden workshops (1) Grden Journals (1) Healing Gardens (1) Heirloom seeds (1) Home Staging (1) Humus (1) Japanese beetles (1) Johnny Jump-ups (1) Kohlrabi (1) Loam (1) Mesquite Flour (1) Microorganisms (1) Phoeniz (1) Pole Beans (1) Red amaranth (1) Sand (1) Sierra Club (1) Slow Food Phoenix (1) Soil Food Web (1) Squash (1) Sweet 100 Cherry Tomatoes (1) Toby Hemenway (1) Tree Pruning (1) Wildlife habitats (1) amaranth (1) artichoke seeds (1) bachelor button (1) bermudal grass removal (1) bird netting (1) bok choy (1) broccoli rabe (1) brussel sprouts (1) bugs (1) cilantro (1) compost. bugs (1) corn cups (1) cutworms (1) dandelion greens (1) digging (1) dirt (1) earthworks (1) eating from the garden (1) edible cactus (1) edible container garden (1) feeding fruit trees (1) fertilizer (1) fleas (1) flies (1) flower gardens (1) food (1) frost (1) fruit trees (1) garden (1) garden bed preparation (1) garden coaching (1) garden disease control (1) garden journal (1) gardening quiz (1) grass (1) green (1) green beans (1) green features (1) green gift giving (1) grren beans (1) harvesting (1) heirloom (1) holloyhocks (1) home selling (1) how much to plant (1) infections (1) injury in the garden (1) ladybird (1) ladybud (1) lavender (1) leafy greens (1) leaves (1) lettuce (1) mosquities (1) mosquito control (1) mycorrhizae (1) native foods (1) native seeds (1) natural mosquito repellant (1) natural mosquitoe repellant (1) new garden (1) olive trees (1) on-line garden club (1) oregano (1) palo verd tree (1) pansies (1) peach (1) peach trees (1) peaches (1) permaculture design (1) permaculture design course (1) pest control (1) pesticides (1) plastic (1) poor drainage (1) praying mantis (1) prickly pear (1) professional gardener (1) protecting fruit trees from birds (1) radicchio (1) radishes (1) rain water (1) rain water harvesting (1) ratoons (1) recycle (1) root rot (1) second crop (1) soil building (1) soil secrets. nitrogen (1) soil testing (1) southwest vegetable gardens (1) spinach (1) squash vines (1) stock (1) summer (1) sunflower (1) sunflowers (1) surface water (1) sustainability (1) sweet peppers (1) tilling (1) tomato (1) transplant (1) trash (1) trees (1) vegetable (1) vegetablvegetable Gardens (1) violas (1) water use (1) waterharvesting (1) watering a garden (1) weather (1) wildflowers (1) wind (1) xeriscape plant (1) year-round gardening (1)